Step one:
Firstly on Photoshop I needed to open up a new blank document. I done this by going on 'File', then 'New...' and then giving my new blank document a name and changed the height and width to 300mm. Once done I clicked 'OK' and my blank document was ready.
Step Two:
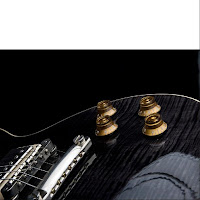
Then I copied and pasted the image I wanted onto this blank document.
Step Three:
After I placed the imaged I wanted onto the blank document I needed to adjust the size. I done this by going 'Edit', then 'Free Transform' and I then stretched the image to the size of the blank document without distorting it.
Step Four:
Once the image was stretched across the blank document I wasn't able to make it the complete size of the blank document as doing so would have distorted the image too much. So to fill in the blank space I used the 'Rectangle' tool and placed it across the blank space, then I used the 'Paint Bucket' tool and filled the blank space in black.
Step Five:
Now I wanted to adjust the colour of some of the image. I did this by going 'Image', then 'Adjustments' and then 'Hue/Saturation...' where I then adjusted the different levels until I got the colour I wanted.
Step Six:
Also I wanted to adjust the brightness of the image. I done this by going 'Image', then 'Adjustments' and then 'Brightness/Contrast...' where then I adjusted the two levels until I got the look I was after.
Step Seven:
Some parts of my image I wanted to make brighter and stand out more. So to do this I used the 'Dodge' tool, then I adjusted the Diameter and Harshness, and simple went over the parts I wanted to change.
Step Eight:

I then wanted to flip my image. I did this by going 'Image', then 'Image rotation' and then 'Flip Horizontal'.
Step Nine:
Now it was time to add some text. I done this by finding a font I liked which I done so off a web site called 'Dafont.com' and the font was under a category called 'Fancy', then 'Old School' and then the font was labelled 'Night Stalker'. Once I had the font and wording I wanted I print screened it and copied and pasted it onto my image, then I used 'Free Transform' to adjust the size to the size I wanted.
Step Ten:
I then wanted to change the white text background black and then black text white. I done so by going 'Image', then 'Adjustments' and then 'Invert' which flipped the colours around.
Step Eleven:
After inverting my text I noticed that the two blacks - the image black and the text black - were slightly off colour. I fixed this by using the 'Eyedropper' tool and selected the image black, and then used the 'Paint Bucket' tool and placed the image black onto the text back resulting in the two blacks matching.
Step Twelve:
Finally I added some more text - using the same process as the previous text - and then I was satisfied with my final results. So I saved my image as a JPEG, so I was able to upload the image as a photo, and then if changed the quality to 12 (maximum) for the best look.


No comments:
Post a Comment